Building hpm plugin for msvc
After you've either built your own plugin or downloaded a plugin from the forums, you need to configure your build to include the plugin as a sub project.
There are 2 guides on how to prepare your Microsoft Visual Studio C++ (MSVC) environment for a new [[HPM]] plugin.
You can choose to follow either one.
Requirements
You need the following:
An IDE to build your server with
Microsoft Visual Studio IDE - This IDE will be used to build your main build solution (your Hercules server), and to include your plugins as new sub projects.
As of December 2018, the IDE version I used for updating this guide uses Microsoft Visual Studio Community 2017, Version 15.2. This property can be viewed when you open the IDE and go to Help > About Microsoft Visual Studio.
A reliable text editor
Notepad++ - A convenient improvement to the standard notepad editor. This will be used when editing .conf files or .c. Unlike more complicated text editors (Sublime Text 3, Visual Code), Notepad++ is much much simpler and would be less confusing for new programmers.
The plugin you wish to install
For this tutorial on how to build your HPM plugin, we will use YourProject as the name of the plugin. This means that it is contained in a file called YourProject.c. Plugins can be downloaded from the Hercules Board, Plugin Releases.
Are there any tools that I can use to automate this?
In May 2018, User Kiriez introduced the VS Plugin Creator, which automates steps 1 to 13 of the New Method described below. I suggest you try this first to see if it works. Give feedback on the tool (whether it works or not, errors you might encounter) on the thread itself.
If his tool didn't work, try using the Plugin Automator for Windows by User fourxhackd, which automates steps 1 to 10 of the New Method.
Using the tools will make sure you don't make simple typo-related mistakes, or placing the files in the wrong folder. Doing it manually, as described in the New Method, will show you exactly what the tools do.
New Method
This new method is recommended. There are two parts to the new method: integrating the plugin into your project's build solution and adding your plugin to the configuration files.
It uses the software Visual Studio IDE Community 2017 and would most likely be the software that you can access and download as of this date.
This method was imported from the Wiki data in 2016, and was updated as of December 2018.
Integrating the Plugin
Step 1
Download the YourProject.c from the Hercules Board, Plugin Releases or build it yourself.
Step 2
Copy or move the YourProject.c file into your /src/plugins/ folder.

Step 3
Depending on which Visual Studio C project version (.vcproj) you are using, navigate to the appropriate folder.
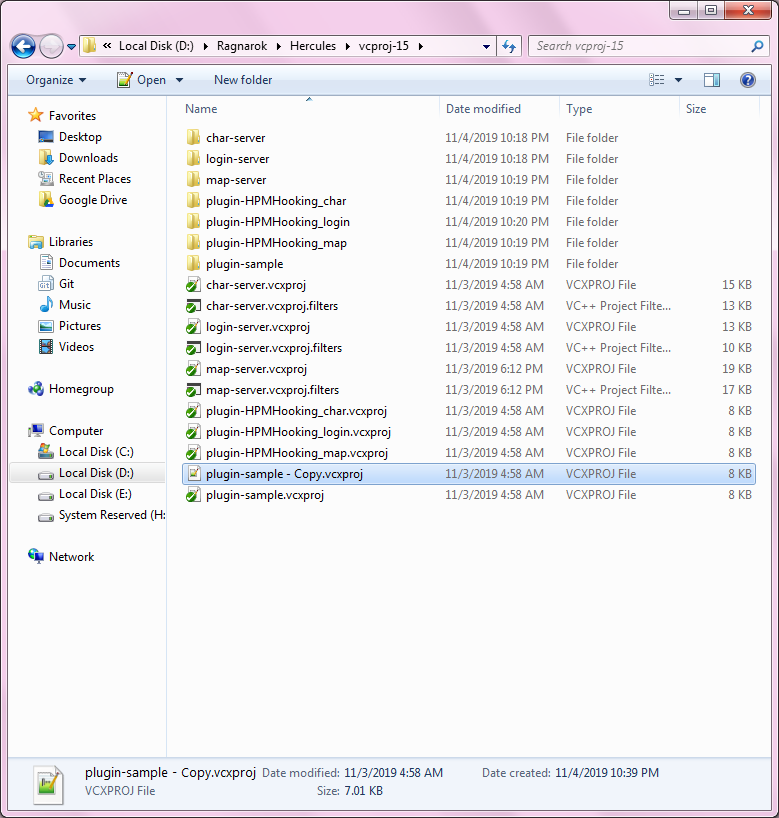
For example, if you are using Microsoft Visual Studio IDE (Community 2017), navigate to the directory \vcproj-15\. We use 15 because that is the latest build type available (better to use 15 instead of using the older build solutions).

Step 4
Select plugin-sample.vcxproj, copy the file, and paste it on the same directory. This will produce a copy of the file with filename plugin-sample - Copy.vcxproj.
Step 5
Rename plugin-sample - Copy.vcxproj into YourProject.vcxproj
While renaming, Highlight the word YourProject and Copy it by Ctrl+C

Step 6
Right click on YourProject.vcxproj, select Edit with Notepad++ or Microsoft Notepad.

Step 7
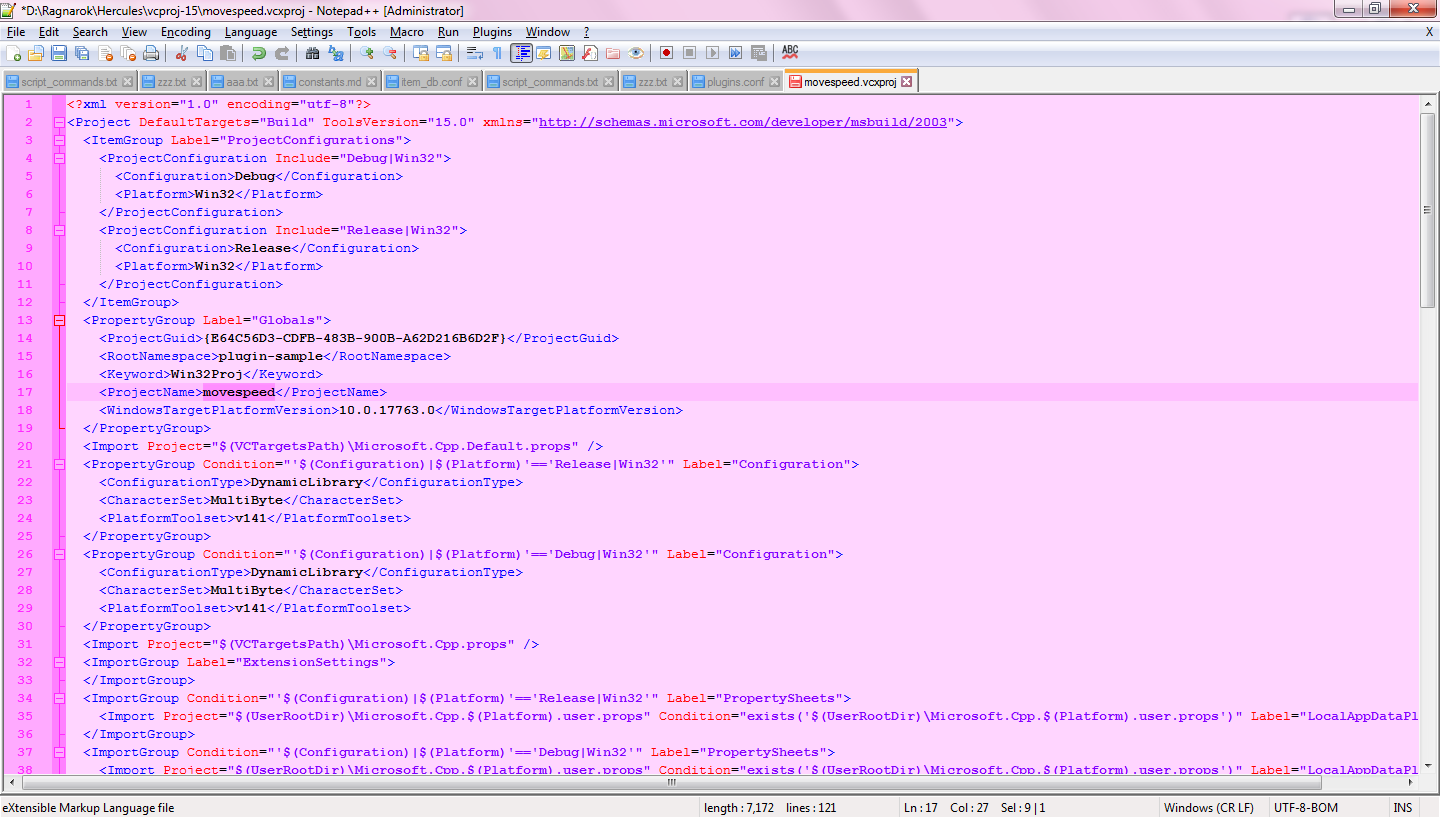
Find the following line:
<ProjectName>plugin-sample</ProjectName>

Replace plugin-sample with YourProject. Make sure that you copy this correctly and not make typos.
To avoid typos, you can use CTRL+C to copy the name of the plugin and CTRL+V to paste the name of the plugin without making mistakes.
Step 8
Find the following line:
<TargetName Condition="'$(Configuration)|$(Platform)'=='Debug|Win32'">sample</TargetName>

Replace sample to YourProject.
<TargetName Condition="'$(Configuration)|$(Platform)'=='Debug|Win32'">YourProject</TargetName>

Step 9
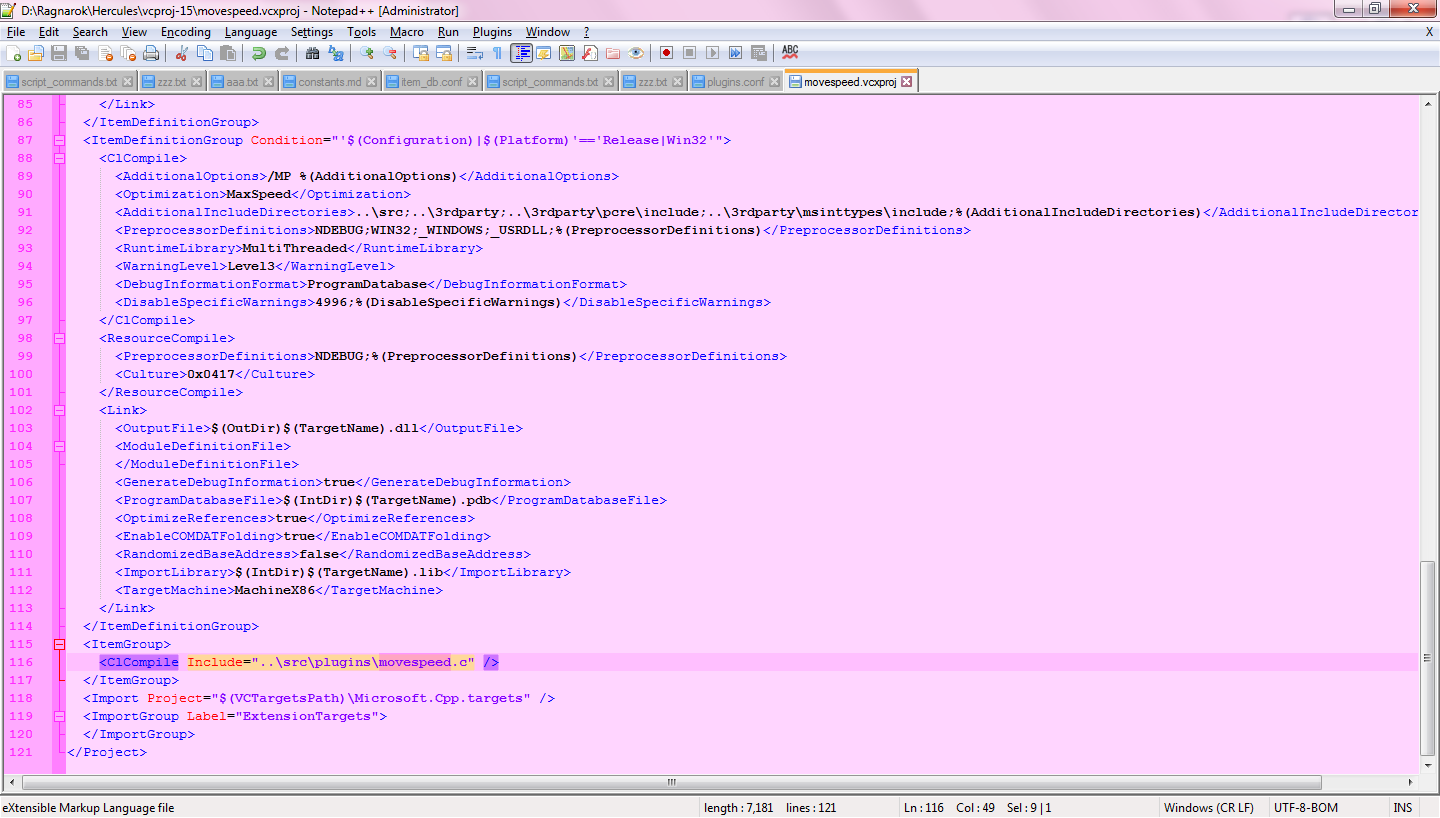
Find the following line:
<ClCompile Include="..\src\plugins\sample.c" />

Replace sample to YourProject.
Step 10
Save the file by pressing CTRL+S.
Step 11
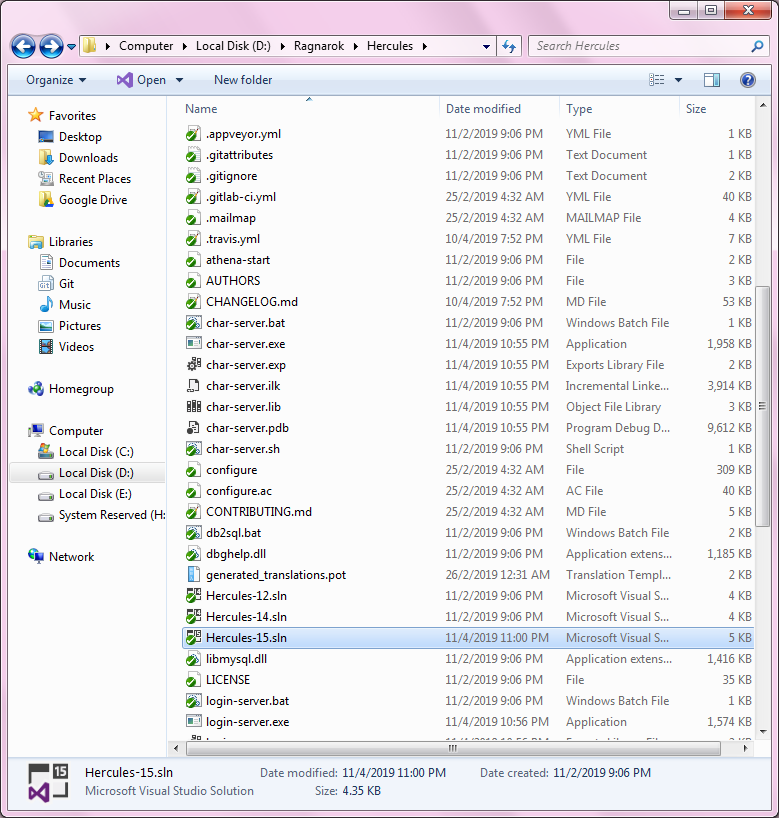
From your the main folder of your server, open the appropriate Visual Studio solution file Hercules-N.sln using your IDE. In this example, we used Hercules-15.sln because we are using Microsoft Visual Studio (Community 2017).
Step 12
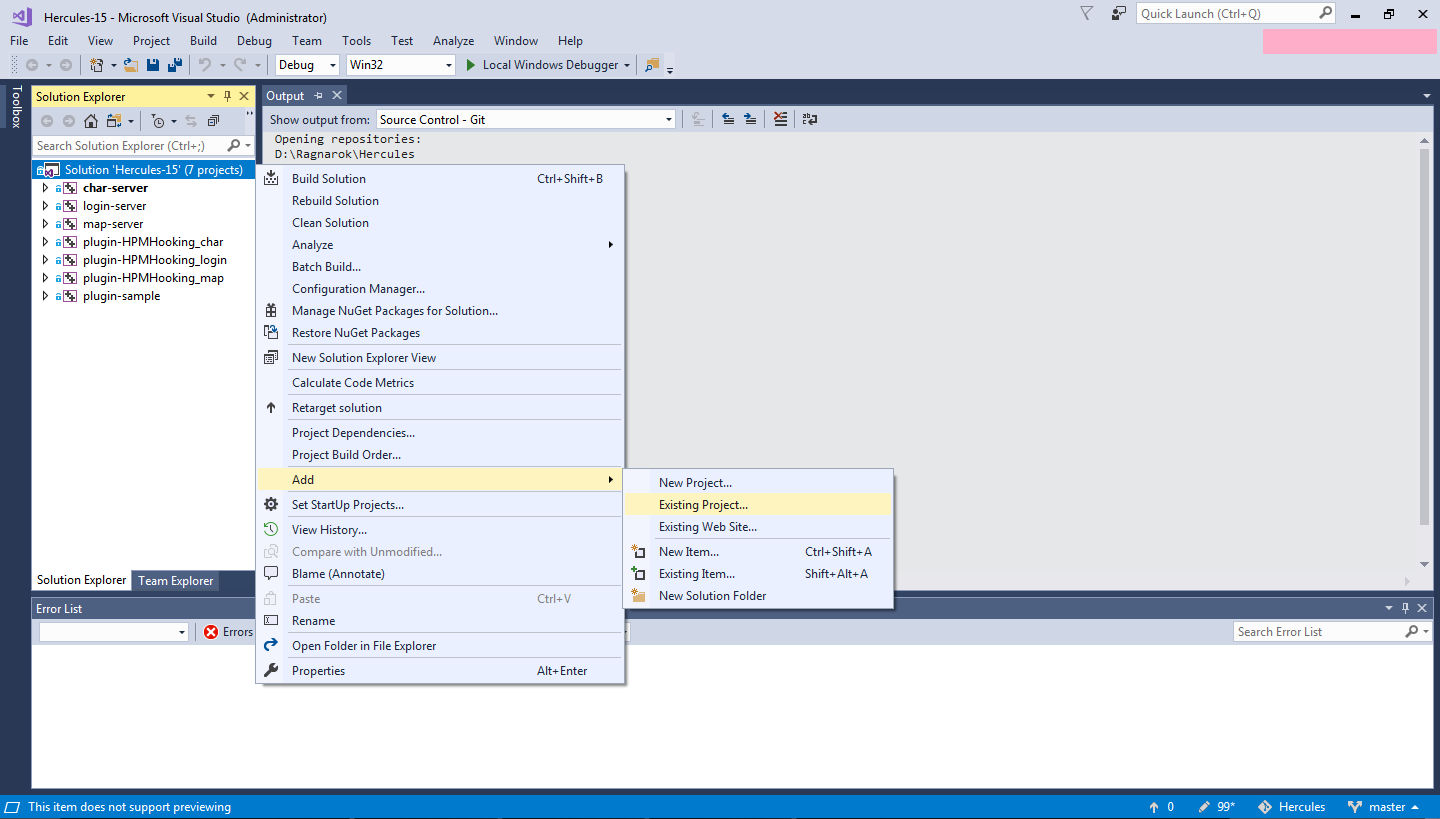
On the Solution Explorer tab, right click Hercules-15, select Add > Existing Project...
Step 13
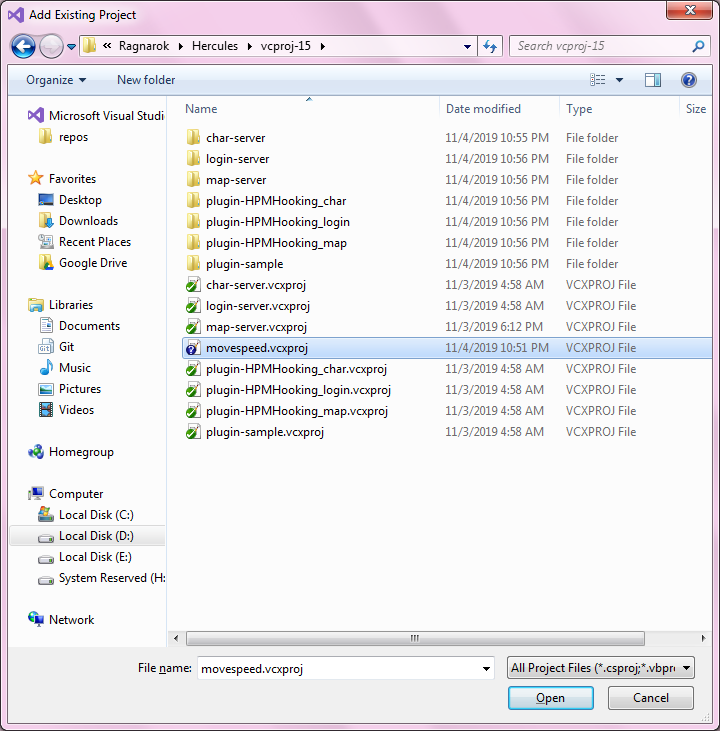
Select YourProject.vcxproj in the \vcproj-15\ folder.
Step 14
Right click `Solution 'Hercules-15' and select Build Solution.

This will now re-build your Hercules server while also integrating your plugin. This patches up the source code as necessary and includes the code into the appropriate .c files without you having to go to the individual files.
Adding your plugin to the configuration
Finally, we will open the file /conf/plugins.conf and include the name of our new plugin into the list.
plugins_list: [
/ Enable HPMHooking when plugins in use rely on Hooking /
//"HPMHooking",
//"db2sql",
//"sample",
//"other",
"YourProject"
]
Old Method
{{Quote|text=This guide used Microsoft Visual Studio C++ (MSVC) 2008 as an IDE. This guide was tested using that IDE as well. It was also tested using Microsoft Visual Studio C++ 2010.|sign=Ind}}
Instructions
Step 1
Go to 'src/plugins/' folder, create a new '.c' file, e.g. 'dance.c' (this name will be used throughout this guide) [[File:step1.JPG|center|750px]]
Step 2
Open dance.c and paste this code
#include "common/hercules.h" // Should always be the first Hercules file included! (if you don't make it first, you won't be able to use interfaces)
#include <stdio.h>
#include <string.h>
#include "common/HPMi.h"
#include "map/script.h"
#include "map/pc.h"
#include "common/HPMDataCheck.h" // should always be the last file included! (if you don't make it last, it'll intentionally break compile time)

HPExport struct hplugin_info pinfo = {
	"dance",		// Plugin name
	SERVER_TYPE_MAP,// Which server types this plugin works with?
	"0.2",			// Plugin version
	HPM_VERSION,	// HPM Version (don't change, macro is automatically updated)
};

ACMD(dance) {
	if (!message || !*message) {
		clif->message(fd, "usage: @dance 1-9");
		return -1;
	}
	if ( atoi(message) == 1 ) {
		clif->specialeffect(&sd->bl, 413, ALL_CLIENT);
	} else if ( atoi(message) == 2 ) {
		clif->specialeffect(&sd->bl, 414, ALL_CLIENT);
	} else if ( atoi(message) == 3 ) {
		clif->specialeffect(&sd->bl, 415, ALL_CLIENT);
	} else if ( atoi(message) == 4 ) {
		clif->specialeffect(&sd->bl, 426, ALL_CLIENT);
	} else if ( atoi(message) == 5 ) {
		clif->specialeffect(&sd->bl, 458, ALL_CLIENT);
	} else if ( atoi(message) == 6 ) {
		clif->specialeffect(&sd->bl, 466, ALL_CLIENT);
	} else if ( atoi(message) == 7 ) {
		clif->specialeffect(&sd->bl, 501, ALL_CLIENT);
	} else if ( atoi(message) == 8 ) {
		clif->specialeffect(&sd->bl, 540, ALL_CLIENT);
	} else if ( atoi(message) == 9 ) {
		clif->specialeffect(&sd->bl, 550, ALL_CLIENT);
	} else {
		clif->message(fd, "usage: @dance 1-9");
	}
	return true;
}

/* Server Startup */
HPExport void plugin_init (void) {
	addAtcommand("dance",dance);
}
Step 3
Open your MSVC project (e.g. '''Hercules-10.sln'') [[File:step2.JPG|center|750px]]
Step 4
Go to the '''Solution Explorer''' [[File:step3.JPG|center|750px]]
Step 5
Right click the Hercules project (first item in '''Solution Explorer'''), and click '''Add->New Project''' [[File:step4.JPG|center|750px]]
Step 6
Select '''General''', and pick '''Empty Project'''. [[File:step5.JPG|center|750px]]
Step 7
Enter the name of your plugin in the '''Name''' field, and click OK.
Step 8
In the solution explorer it'll display the new project. [[File:step6.JPG|center|750px]]
Step 9
Right click the new project, and open '''Add->Existing Item''' [[File:step7.JPG|center|750px]]
Step 10
Browse to '''src/plugins/''' and select the '''dance.c''' file, and hit OK. [[File:step8.JPG|center|750px]]
Step 11
It will place the '''dance.c''' file under the '''Source Files''' folder, drag it to the project you created and drop it (in a manner it be placed out of the source files folder.) [[File:step9.JPG|center|750px]] (It should look like the image below) [[File:step10.JPG|center|750px]]
Step 12
With the '''dance.c''' out of the folders, delete the 3 of them (select the 3, hit delete, hit ok) [[File:step11.JPG|center|750px]] (It should look like the image below) [[File:step12.JPG|center|750px]]
Step 13
Right click the project you created, open '''Properties''' [[File:step13.JPG|center|750px]]
Step 14
Under '''Configuration Properties''' click '''General''', change '''Output Directory''' to '''..\plugins\''', '''Intermediate Directory''' to '''$(ProjectName)\$(ConfigurationName)\''' and '''Configuration Type''' to '''Dynamic Library (.dll)''' [[File:step14.JPG|center|750px]]
Step 15
Under '''Configuration Properties''' click '''C/C++''' and open '''General''', change '''Additional Include Directories''' to '''..\src;..\3rdparty;..\3rdparty\msinttypes\include;%(AdditionalIncludeDirectories)''' [[File:step15.JPG|center|750px]]
Step 16
Under '''Configuration Properties''' click '''Linker''' and open '''General''', change '''Output File''' to '''$(OutDir)\$(ProjectName).dll''' [[File:step16.JPG|center|750px]]
Step 17
Under '''Configuration Properties''' click '''C/C++''' and open '''Preprocessor''', change '''Preprocessor Definitions''' to '''_WINDLL;PCRE_SUPPORT;%(PreprocessorDefinitions)''' [[File:step17.jpg|center|750px]]
Step 18
Under '''Configuration Properties''' click '''C/C++''' and open '''Advanced''', on '''Disable Specific Warnings''' add '''4996;%(DisableSpecificWarnings)'''
This step can prevent errors like ''sscanf'' or ''sprintf'' that only happen with Microsoft compiler.
[[File:step18.png|center|750px]]
Step 19
Add your code to the '''dance.c''' file, and then right-click the project you created, and select '''Build'''
Step 20
Add it to ''' /conf/plugins.conf'''
plugins_list: [
    /* Enable HPMHooking when plugins in use rely on Hooking */
    //"HPMHooking",
    //"db2sql",
    //"sample",
    //"other",
    "dance", // loads dance plugin
]
Notes
- This guide is probably the worst I've ever written, if you can do better please hit the 'Edit' button, will be most welcome. - Ind
- I used MSVC 2008 when testing this guide.
- Sorry for editing this page, I added step by step images for other people to follow so they can easily follow one of the best feature Hercules have, the HPM. - Thanna
- The tutorial is tested on MSVC 2010.
- Another method idea by hemagx, sorry for publish it first - AnnieRuru.